
How To Open A Port In Windows Firewall
Opening a port on a Windows computer allows specific incoming traffic to reach the host through that port. This can be useful for allowing certain services, such as a web server or an FTP server, file-sharing networks such as DC ++ and torrent or various games like minecraft to be accessible to external clients. In this article, we'll explain how to open a port on a Windows computer.

Steps to Open Port in Windows Firewall
Follow these steps to open firewall ports in Windows 10, although the steps for other versions of Windows should be similar:
-
Open the Control Panel by searching for it in the Windows search bar.
-
Select "System and Security" from the available options.
-
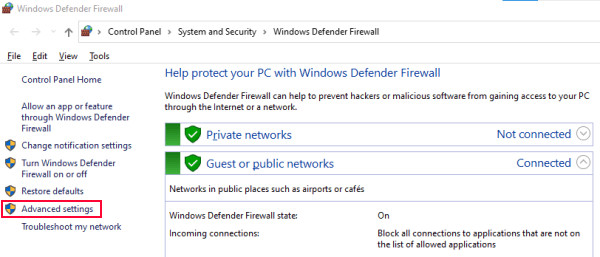
Select "Windows Defender Firewall".
-
On the left side, find and select "Advanced Settings".
-
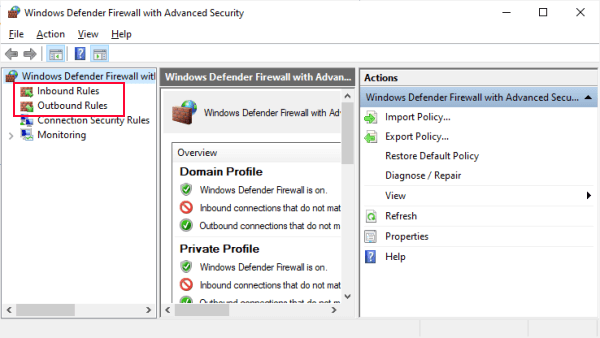
The "Advanced Settings" window should open. You will have two different rules that you can edit: "Inbound Rules" which govern incoming connections to your computer, and "Outbound Rules" which govern outgoing connections from your computer. Right-click either "Inbound Rules" or "Outbound Rules" and select "New Rule" to create a new rule.
-
To add a rule for an incoming or outgoing port, select the "Port" option.
-
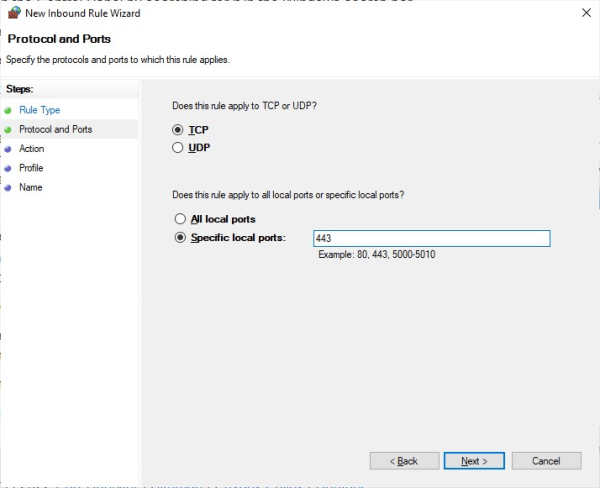
Select the type of connection to apply, either TCP or UDP. Most ports use TCP unless otherwise specified. Manually enter the port number in the text box and click "Next" when you have specified it to suit your needs.
-
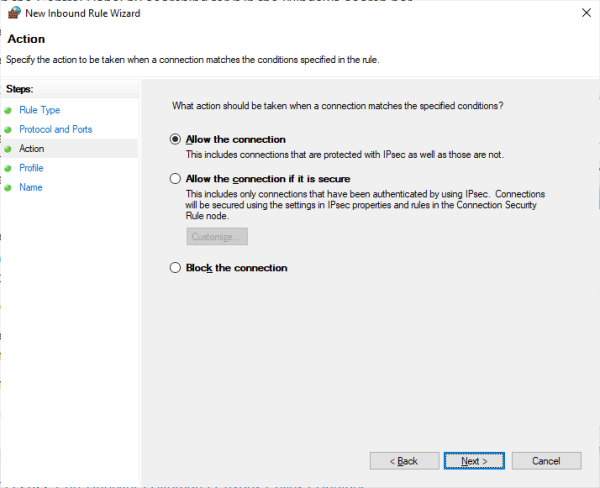
Choose whether the connection allows the connection or blocks it.
-
Select the rules that apply and what you consider necessary. In general, you'll want to make sure "Public" is checked.
-
Some Windows firewalls allow you to give the rule a name and description, which is the last step.
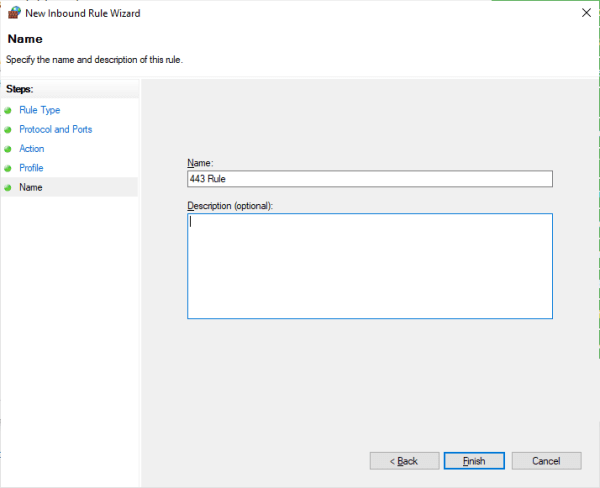
After completing these steps, your port should now be open. Click "Finish" to save your changes and you are ready to test newly opened port .